LIGUE World of Warcraft Miniatures 2012

Ainsi débute la ligue de 2012 qui se déroulera sur 12 tournoi et où les scores des 6 meilleurs résultats de l'année pour chaque joueur donneront le Champion de la Ligue 2012

Règle :
- Utilisation d'une Epic uniquement en full faction : exemple Bolvar avec des humains ( sauf celle qui n'ont pas de troupe )
- Un personnage nommé ne peut être en double dans une team
- Trois points pour une victoire, 2 pour le bye et 1 pour une défaite
- Vous pouvez gagner un point sur le tournoi si vous remplissait une des options suivantes :
Team full faction
Team avec une Epic ( vous ne pourrez gagner un point qu'une fois par Epic par an )
Team avec la même classe ( Mage , Paladin ect ...)

Frederic 9pts - // - 11pts - // - 12pts - // - // - // - 10 - // -
Xavier 8pts - 9pts - 12pts - 11pts - 14pts - 7pts - 11pts - 15pts - 13pts - 14pts -
Yann 7pts - 7 pts - 8pts - 6pts - 10pts - // - 11pts - 10pts - 9pts - 8pts -
Tanguy 5pts - // - 9pts - // - 8pts - 9pts - // - 10pts - // - 9pts -
Lauky 5pts - 7pts - 9pts - 9pts - 8pts - // - 10pts - // - // -
Thomas // - 7pts - 5pts - 5pts - 5pts - 8pts - 10pts - 6pts - 7pts - 12pts -

mais tout ne fait que commencer !!

Tournoi du Mois de Mars

Tournoi de la ligue le dimanche 10 Mars
Inscript
+ Xavier
+ Thomas
+ Frederic
+ Lauky
+ Yann
+Tanguy

Tournoi

NOUVEAU FORUM

jeudi 28 janvier 2010

mercredi 27 janvier 2010

Duel scellé du 27 janvier

MA TEAM
- Lady Vashj honor 10 Shaman
- Ethereal Crypt Raider honor 4 Guerrier
- Warp Stalker honor 4

TEAM de THOMAS
- Warp Stalker honor 4
- Ethereal Priest honor 7 Prêtre
- Crashing Wave Spirit honor 4

Rapport :
Tour 2 Ethereal Priest mort ( 4 points pour les monstres A )
Tour 2 Warp A mort ( 4 points pour les monstres B ) Perfect Shot
Tour 4 Warp B mort ( 8 points pour les monstres A ) Perfect Shot / One Shot
Tour 5 1 point pour les monstres A
Tour 7 Crypt Raider mort ( 8 points pour les monstres B )
Tour 10 Ethereal Priest mort ( 13 points pour les monstres A )
Tour 10 Warp B mort ( 17 points pour les monstres A )
Tour 10 2 points pour les monstres A
Victoire des monstres A

vendredi 22 janvier 2010

Le livre d'Eli


Dans un futur proche, l'Amérique n'est plus qu'une terre désolée dont les villes sont des ruines et les routes autant de pièges infestés de bandes criminelles. Depuis des années, Eli voyage seul, se protégeant des attaques et se battant pour trouver de quoi survivre. Lorsqu'il arrive dans ce qui fut autrefois la Californie, Eli se heurte au redoutable Carnegie, un homme qui ne recule devant rien pour imposer sa volonté à la petite communauté qu'il contrôle. Eli fait aussi la connaissance de la très belle Solara et découvre que Carnegie compte bien étendre sa sombre domination à toute la région. Eli parvient à échapper de Carnegie, mais Solara l'a suivi... Même s'il est décidé à poursuivre sa route en solitaire, Eli comprend qu'il ne peut abandonner la jeune femme. Pour elle, il va prendre des risques qu'il n'a jamais pris pour lui-même. Mais Carnegie est sur leurs traces et alors que se profile l'inéluctable affrontement, Eli va prendre conscience qu'il a le pouvoir de faire bien plus que sauver une femme et sa propre vie : son destin est de redonner l'espoir, de sauver le futur en soufflant sur les braises d'une humanité qui n'attend que l'étincelle...


jeudi 21 janvier 2010

Duel construit du 20 janvier

MA TEAM
-Wilton Thorne honor 4 Guerrier +4
- Omedus the Punisher honor 7 Prêtre +3
- Morganis blackvein honor 6 Mage

TEAM de TANGUY
- Conqueror Aluna honor 7 Chasseur
- Thangal honor 8 Druide
- Shadowsun honor 8 Prêtre

Rapport :
Tour 2 Aluna mort ( 4 points pour la Horde A )
Tour 3 Wilton mort ( 4 points pour la Horde B )
Tour 4 Shadowsun mort ( 8 points pour la Horde A )
Tour 5 Morganis mort ( 8 points pour la Horde B ) One Shot
Tour 5 1 point pour la Horde A
Tour 6 Thangal mort ( 13 points pour la Horde A )
Tour 7 Omedus mort ( 12 points pour la Horde B )
Tour 10 1 point pour la Horde A
Tour 12 Morganis mort ( 16 points pour la Horde B ) Perfect Shot
Tour 12 Thangal mort ( 18 points pour la Horde A ) One Shot
Tour 12 Shadowsun mort ( 22 points pour la Horde A ) Perfect Shot
Tour 15 Wilton mort ( 20 points pour la Horde B )
Tour 15 1 point pour la Horde B

Erreur de point qui donnera la Victoire à Tanguy alors qu'il lui manquait 2 points

lundi 18 janvier 2010

Loot The hunt for Illidan


News promo

Pour les arbitres :

Petit visuels des cartes du RC


dimanche 17 janvier 2010

Duels du 17 janvier

MA TEAM
- Archmage Arugal honor 10 Mage
- Crushing Ogre honor 7 Shaman
- Rethilgore honor 5

Ma team est un scellé un booster

Team de VINCENT D
- Moonshadow honor 5 Druide

Rapport :
Tour 5 Ogre mort ( 4 points pour l'Alliance )
Tour 5 Moonshadow forme ours mort ( 4 points pour les monstres )
Tour 5 2 points dans chaque camp
Tour 7 Moonshadow forme chat mort ( 10 points pour les monstres )
Tour 10 2 points pour les monstres et 1 pour l'Alliance
Tour 15 2 points pour les monstres
Tour 20 Moonshadow forme ours mort ( 18 points pour les monstres )
Tour 20 2 points pour les monstres
Tour 25 Moonshadow mort ( 24 points pour les monstres )
Victoire des monstres

TEAM de VINCENT
Kayleitha honor 6 Voleur +2
Azarak honor 5 Chasseur
Hulok honor 5 Druide

Rapport :
Tour 5 Azarak mort ( 4 points pour les monstres ) Perfect Shot
Tour 5 2 points pour les monstres et 1 pour la Horde
Tour 7 Kayleitha mort ( 10 points pour les monstres ) Perfect Shot / One Shot
Tour 8 Azarak mort ( 14 points pour les monstres ) Perfect Shot / One Shot
Tour 9 Hulok mort ( 18 points pour les monstres ) Perfect Shot
Tour 10 2 points pour les monstres
Tour 15 Kayleitha mort ( 24 points pour les monstres )
Victoire des Monstres

vendredi 15 janvier 2010

Class Starter Decks

Class Starter Decks
Release Date: March 2010

Each Class Deck Contains 63 cards:
60 Card Deck
Tournament Playable!
Random and fixed content
2 Hero Cards (one of each faction from stated class)
1 UDE Points Card or Loot™ Card
1 Quickstart Rules Guide
Choose Your Class!

For the first time in World of Warcraft TCG history, select your faction and class and get a tournament playable 60-card deck plus heroes!
Features new exclusive cards along with some all-time favorites!
Each deck has a chance to get any previous Loot™ Card!
Horde and Alliance Decks are available for each of the following classes: Druid, Hunter, Mage, Paladin, Priest, Rogue, Shaman, Warlock, Warrior.

jeudi 14 janvier 2010

Duels construit du 13 janvier

MA TEAM
- Enraged Fire Spirit honor 8
- Slitherblade Tidehunter honor 8 Chasseur
- Tempest Forge Destroyer honor 6

TEAM de CLEMENT
- Boulderfist Warrior honor 6 Guerrier
- Dagg'um Ty'gor honor 5 Voleur

Rapport :
Tour 4 Dagg'um mort ( 4 points pour les monstres A )
Tour 5 Ogre bleu mort ( 8 points pour les monstres A )
Tour 5 Tempest mort ( 4 points pour les monstres B )
Tour 5 1 point pour les monstres A
Tour 8 Ogre rouge mort ( 13 points pour les monstres A ) Perfect Shot
Tour 10 Dagg'um mort ( 17 points pour les monstres A ) Perfect Shot
Tour 10 2 points pour les monstres A
Tour 12 Ogre rouge mort ( 23 points pour les monstres A )
Victoire des Monstres A

mercredi 13 janvier 2010

Duels Scellé du 13 janvier

MA TEAM
- Enraged Fire Spirit honor 8
- Slitherblade Tidehunter honor 8 Chasseur

TEAM de THOMAS
- Felguard Legionnaire honor 7
- Tempest Forge Destroyer honor 6

Rapport A :
Tour 5 2 points pour les monstres B
Tour 6 Tempest mort ( 4 points pour les monstres A )
Tour 7 Felguard mort ( 8 points pour les monstres A )
Tour 10 1 point pour les monstres A
Tour 12 Tempest mort ( 13 points pour les monstres A )
Tour 15 Fire mort ( 6 points pour les monstres B ) Perfect Shot
Tour 17 Felguard mort ( 8 points pour les monstres A )
Victoire des Monstres A

Rapport B :
Tour 4 Felguard mort ( 4 points pour les monstres A )
Tour 5 1 point pour les monstres B
Tour 6 Fire mort ( 5 points pour les monstres B )
Tour 6 Tempest mort ( 8 points pour les monstres A )
Tour 12 Felguard mort ( 12 points pour les monstres A )
Tour 14 Tempest mort ( 16 points pour les monstres A )
Victoire des Monstres A

Orc Warchief Thrall


World of Warcraft Premium S2 Orc Warchief Thrall AF

Description

Et voici la série 2 annoncée par DC Direct!
Avec ici en version Premium d'un Orc Warchief Thrall.
Superbe figurine PVC articulée de très grande qualité comme toujours, une pièce d'exception qui ravira tous les fans de WOW!!!!

De DC Direct
Taille:
26cm
En PVC

dimanche 10 janvier 2010

Gorebelly Promo


Boss tactics for Lamia Morta

Clotho whispered to her infernal siblings, “Shhh. Did you hear something, sisters?”

Lachesis paused in her work and listened for a moment. She smiled as she heard the faint but distinctive sounds of an approaching group. “Only the sound of fools eager to add their souls to our pot, sisters.”

Atropos giggled and ran one of her hands through the dark bubbling ether that roiled in the dark granite cauldron at the center of the den. “By the sounds of their numbers, our cauldron will be overflowing with souls, sisters!”

Clotho slowly rose from the darkwood spinning wheel and approached the numerous racks of armor and weapons that lined the walls of their stone lair. “It does not matter their numbers. I have spun their threads.” She picked up a battle-worn pair of gauntlets and fitted them to her lower wrists. “They end here, sisters.”

Lachesis joined her sister at the racks and fitted a tarnished golden circlet to her head. “I too have seen their fate and measured their lives. Our sister is right. These fools and their souls will soon be parted.”

Atropos grabbed a pair of shears, a greatsword, a wickedly sharp throwing axe, and an ivory kris with her many hands. “All that remains is the cutting!”

*****

Lamia Morta, How All Deaths Begin . . . is the third in Corle Huffman's raid series, and the best by a large margin, in my opinion! This raid is just so incredibly good, it outshines the others. This was the first scenario I've run where it felt like a raid should feel: fast, adrenaline-pumping action where the characters just try to stay alive as long as possible in order to have a chance of beating the final boss.

I didn't help develop this raid, but I have played as the raid boss enough to learn my way around the encounter. I wrote this article in order to showcase some of the tips and tricks I've learned for other aspiring raid bosses. That said, there is some very useful information in here for wannabe heroes, also—fools!

Like raids in the MMO, this one comes in stages. The first stage is the three Moirae Sisters and the pool of weapons and armor that they draw from.

Stage 1 Raid Boss Goals

  1. Destroy at least one character.

  2. If you do use your Gown's special ability, make sure that it is only to get a guaranteed kill.

As the raid boss, you may have a tough order to fill if there are some smart players running the heroes. They should be protecting their Mages, Priests, and Warlocks with heavily-armored protectors while presenting you with tanks on the front line, sporting some obscene armor totals thanks to buffs like Blessing of Kings or Vindicator Hodoon’s aura. In addition, they should have at least one taunter, if not two. Your go-to weapon in this phase will either be the Staff or the Hellreaver, as they can dish out some serious damage.

Remember—you are only trying to knock down one character. Concentrate your fire and look for opportunities to one-shot weak characters with a Girdle/Staff strike. The most useful tactic for me was using the Shears to move and isolate a character on the front lines closer to my other two sisters, and then use a Staff/Reaver combo-strike to finish them. If they only present a target with 5-6 armor, then the Shears aren't going to do much more than 1-2 damage. Usually, that won't be enough to completely isolate them from their allies' reactions. In this case, you might have to work out those buffs with the Kris and just hope for a crit. Pay very special attention to your clock and watch out for Viper Sting followed by a non-Polymorph tick up. That can spell doom for your plans pretty quickly!

It’s very easy to screen against the negate ability of the Moirae, so don't count on being able to stop the heavy attacks or key plays. Players are rewarded for being able to position correctly during this phase. Once you've smashed them a few times, don't get discouraged when they figure out a way to beat Stage 1 without losing anyone.

Stage 2 Raid Boss Goals

  1. Kill the Hunter, or the main DPS if there is no Hunter.

  2. Spread out the characters.

Hunters can hurt you in Stage 3 with Viper Sting, forcing you to spend a tick getting it off. If the Hunter is also a heavy-hitting type like Aluna, then you seriously need to get rid of him/her. Characters like Irana, Daelus, or Druids packing Starfire are also reasons for concern. Mages are easier to kill with the Spirits, because it’s just too hard to keep them alive without a powerful healing strategy. However, this usually means a weakened opening in Stage 1. Try to spread out the players as much as possible in preparation for the final stage.

Stage 3

  1. Destroy, maim, kill.

You will find it very easy to start dropping characters in this stage. In fact, you should be dropping a character per tick—and since you attack on every tick, the players are on a very tight countdown! Keep in mind that you aren't unbeatable. With your 3 resist and 4 armor, heavy-hitting characters can start to mess up your health pretty quickly. Starfire, Savin's strike, Aluna with Arcane Shot, and Daxin are all tough to handle. Anything that can do 7+ damage is a big worry. Try to take down two characters with your first action by Girdling into a Staff strike on a full character, and Kris-punching a weakened character. This also ticks up two characters, so try to take full advantage of that Staff.

If they are going the Blood Elf route with Shadowsun, then it is possible that they could Viper Sting you and exhaust 4-5 pieces of equipment on the round you come out. Since you generally have to use one of your three instants to ready your best weapon (either the Shears, the Staff, or the Reaver) and another to Kris strike, your turn only costs you 1 tick. Usually, you can only ready one piece of exhausted equipment in such a scenario. And forget about using the Girdle, in this case! If you were Stung during this time then that's pretty bad, since you will have to spend a tick getting rid of it. This is an incredibly hard strategy for the players to actually pull off if you exhaust and ready the right pieces of equipment, as they will constantly be taking 3 damage from the Gloves. Even so, it forces you to pay attention to what you exhaust and how you use your instants. Use your Staff tick up, don't forget about the Hellreaver's ability to exhaust their Action Bar cards if there is something you are worried about, and try hit-and-run tactics with your 3 movement until you have knocked out the problem characters.

Always, always, always make sure that you are only spending 1 tick to attack! Don't put yourself in a position where you accidentally kill a character with your main swing and have nothing to swing the Kris at to bring you back down. Follow these steps, and you should be giving your players the raid scenario they deserve: a long, hard slog to victory.


*****

As the final Moirae fell, the battle ended with a clang of metal. Implements of war slid from the sister's dying hands to rattle against the stone floor.

Fillet took a deep breath and wiped the blood from his eyebrows. He glanced uneasily towards his sole remaining companion. A fading light of falling star-trails illuminated the hesitant expression on the Night Elf's face.

"Is it really over?” she asked.

“Yes,” the Warrior answered, strapping his trusty axe to his belt.

Moonshadow looked over the field of corpses—trusted allies and hard-fought enemies alike. “Was it worth it?”

The Gnome bent down and grasped the hilt of a giant polearm. “Hell yes!” he exclaimed, his tiny hands raising Hellreaver high into the air.

lien

samedi 9 janvier 2010

Kaamelott vol.4

Perceval et le dragon d'airain

Auteurs : Alexandre Astrier, Steven Dupré Date de parution : 25/11/2009
Collection : Univers d'Auteurs
Serie : Kaamelott
Tome : 4
Prix : 12,50 €

Le terrible Dragon d'Airain s'est réveillé ! N'écoutant que son courage, le Chevalier Lancelot se lance aussitôt vers le village menacé pour terrasser le monstre. Mais c'est compter sans l'intervention du Chevalier Perceval, qui ne supporte plus l’inaction forcée subie depuis trop longtemps à Kaamelott. Bien décidé à s'acquitter lui-même d’une Quête qui nourrira sa gloire, Perceval se lance lui aussi à la rencontre de la bête, flanqué de son inséparable furet de guerre…

produits dérirées Blizzcon

vendredi 8 janvier 2010

Raid " Lamia Morta "

Drums beat in the old cathedral, and a dull fire burns in its darkness. The smell of sickly-spiced incense lingers around the desecration. All about, a chalky orange smoke clouds your vision. Skeletons litter the ground and crunch beneath your feet. You have heard rumors—but not like this. Scarlet draperies hang on the sloped walls. You have heard this is where they make their lair—but not like this.

From some dark corner drifts the eerie sound of an ancient Spindle. Somewhere, a thread is being Measured. Somewhere, the snipping sound of Shears. Then comes a witch’s voice, old and cackled, both 1 & 3 at once: “Much death have these ancient artifacts wrought since their creation. Your deaths, Mortals, will be counted amidst their notches!”

Welcome to the third World of Warcraft Minis raid encounter: Lamia Morta, How All Deaths Begin . . . Last time, players fought against a completely programmed raid boss, Hastur. For those that survived Hastur’s automated attempts to possess their souls, things will be reversed this time—Lamia Morta is a fully competitive raid.

One player must play as the raid boss!

Don’t worry—there are still significant cooperative elements to the raid. For the most part, this raid is designed to be played competitively. The ideal number of players for Lamia Morta is three: one player to play as Lamia Morta, one player to pilot Raid Party 1, and one player to pilot Raid Party 2. Alternately, one player may play as Lamia Morta while the other player controls both raid parties.

Champion Shadowsun and his Blood Elf allies hid behind a fallen stone pillar. So far, they had remained unnoticed—or ignored—by Clotho, Lachesis, and Atropos. The three demon-sisters marched directly forward, weapons and armor glistening. Directly in their path stood the other raid party: Cairne, Amalar, and Gorebelly! Magistrix Enaria would hang back for crowd control. If all goes to plan, both raid parties will hit the enemy at the same time. If all goes well, some heroes might survive.

Difficulty Level: Easy/Medium/Hard/Epic

This raid cannot be played solo. Believe me, I tried to test it solo! One player must play as the raid boss. Additionally, at least two more players are highly recommended to each play one of the raiding parties. Yes, the players get two raid parties for this encounter. While a single player can attempt to play both raid parties, the encounter is far smoother when two (or more) players run the two raid parties. If more players are present, the two raid parties can be divided however the players choose—so long as for game purposes they remain two distinct raid parties. Keeping them distinct is critical for Stage 2.

So why do the raid players get two parties?

STAGE 1

That’s why.

Fillet winced, took a step backwards, and whispered to Parvink, “Um . . . ladies first?”

Lamia Morta, How All Deaths Begin . . . uses all the official rules for World of Warcraft Minis. The Core Set, Spoils of War, and all promos and Crafting items from those sets are legal for this .

Bregina Stoneshiv shook her head no. “Sorry, I can’t go in there,” she explained. “I’ve got plans to die from old age.”

PARTY BUILDING

The raid players first choose whether they wish to play Alliance, Horde, or Monsters. Then the raid players build two separate raid parties, each with exactly 4 characters, and each up to 27 honor. These separate raid parties are referred to as “Raid Party 1” and “Raid Party 2.” All heroes in both raid parties are considered to be allies. Both raid parties must be from the same faction. All heroes are considered unique for this raid—no duplicate heroes are allowed. Upon death, heroes do not respawn and their abilities cease to activate.

Namrah closed Ruby’s eyes. “Sometimes at the end of light, there is only shadow.”

If the term “raid party” does not reference a number (1 or 2) then the term refers to all players playing in either Raid Party 1 or Raid Party 2.

MAP

STARTING LOCATION

The raid party chooses if they want to start from the red Spawn Points or the blue Spawn Points. The raid boss starts from the opposite set of Spawn Points. Both sides may use either of their two Spawn Points.

AGGRO TOKENS

As Lamia Morta must be managed by a player, there is no need for Aggro Tokens.

Vindicator Hodoon’s armor bent from the force of the blows, but still he held the Demon’s attention. “Demon, the light shields me!”

RAID PARTY BONUSES

One character total—chosen from Raid Party 1—may be designated as the Party Leader. Raid Party 1’s Leader cannot be ticked up by enemies.

One character total—chosen from Raid Party 2—may be designed as the Party Leader. Raid Party 2’s Leader cannot be moved by enemies.

Haruka lifted her Ancient Manslayer. Suddenly, compared to the demon-witch’s array of arms, her weapon seemed neither ancient nor deadly.

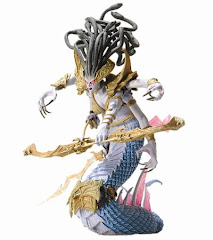
CLOTHO, LACHESIS, AND ATROPOS SPECIAL ABILITES

The three witches share their Action Bar. They have the following 7 pieces of weaponry and 9 pieces of armor/trinkets in their Action Bar.

Weapons

Each weapon has an “After this attack” clause. These effects are not optional.

Parvink had always considered herself a master of arms . . . that is, until she met Lamia.

    Armor/Trinkets

Armor has no effect and cannot be used when exhausted.

Dibs on that helmet!” shouted Illiana Sunshield.

  • Energy Shackle: If any of Clotho, Lachesis, or Atropos is outside their Lair at the end of any tick, they take 2 damage. Outside their Lair refers to any space outside the red circle below:

Fear,” explained Magistrix Kiala, “is a girl’s best friend.”

  • Inner Circle: If Clotho, Lachesis, or Atropos is on or adjacent to the VP at the end of any tick, they heal 1 damage.

Za’zu loaded a heavy, blunted arrow. “Joo know mon, sometimes distraction is de attraction.”

When the last Shivan is destroyed, the raid immediately progresses . . . to Stage 2.

STAGE 2

The Phantom Moiraes enter play with their personal clocks set to the master clock.

For example: if Daelas Firewing is the last character to act on tick 7, and Daelas uses Pyroblast to kill the last Shivan, Stage 2 immediately begins on tick 7 because the master clock has not yet moved. Daelas, of course, will still tick to 12.

Twins?” asked Dagg’um Ty’gor. “I hate twins.”

No, not twins. The two Phantom Moiraes above are slightly different. Their Shadowsteps affect different raid parties. The first deals with Raid Party 1; the second deals with Raid Party 2.

Deathwatcher squinted an evil eye at Storm Rager. “I make the better Phantom Moirae!” Storm Rager blew a kiss in return.

PHANTOM MOIRAE SPECIAL ABILITIES

  • Sated: When a Phantom Moirae kills the target it possessed, only the specific Phantom Moirae that placed that possessed token is destroyed.

Timmo Shadestep cleaned his dagger on his boot. “Well, I’m certainly glad that’s over.”

  • Possession: When a Phantom Moirae spawns next to an enemy, even if there are multiple adjacent enemies, the raid boss may only place one possession token. A character with a possession token may not attack, target, or affect either Phantom Moirae.

Such pretty, pretty skills,” said Dizdemona. “How can I steal them?

When the last Phantom Moirae is destroyed, the raid immediately progresses to Stage 3.

STAGE 3

Lamia Morta enters play with her personal clock set to the master clock.

Your fate hangs by a thread, Mortal!”

Lamia Morta

LAMIA MORTA SPECIAL ABILITES

  • Weapon Master: Weapon Master triggers every time Lamia strikes with a weapon. Therefore, if Lamia strikes with Hellreaver, the net result is that she will only tick up 2. If Lamia then strikes with a 0 tick weapon, like The Ivory Kris, this will subtract another -1 from her personal clock.

Better than anyone, Ixamos the Redeemed understood the importance of haste in battle. Even so, the demon’s unholy celerity left him utterly speechless.

  • Zero Surge: Lamia may play up to 3 instants per turn. She may, if she wishes, use the same instant multiple times. For example, Lamia may strike 3 times with The Ivory Kris.

Morova tried to keep her eye focused on the Demon’s dagger. She may as well have tried plucking down the moon.

  • Energy Shackle & Inner Circle: These abilities are only for Clotho, Lachesis, and Atropos. They do not affect Lamia.

  • Intemporal: This ability is only for Clotho, Lachesis, and Atropos. It does not affect Lamia. Lamia’s weapons will ready as normal at the end of tick 10.

The raid ends when Lamia is destroyed or when all heroes have died.


Bolvar signaled by lifting his bronze shield . . .
Leeeerooooy Jenkins . . .
Elanna notched a masterful arrow . . .
Savin charged!
fin

Best of luck with the raid, guys. Feel free to ask any questions in the forum. If there are enough questions, I’ll compile an FAQ.